Building a fault-tolerant content API using Strapi and Qoddi
The second part of this tutorial, about the first use of Strapi, is a copy of the official Strapi Getting Started guide, available here.
Deploy your code in seconds, with no infrastructure to manage. Qoddi App Platform is free for developers! Create an account today.
Strapi is a very popular headless CMS, and you probably have heard very good things about it. Here at FlashDrive, we love it and use it everyday!
On Qoddi, Strapi is available as a one-click installation product inside the Qoddi marketplace.
In this tutorial, you will learn how to install Strapi on Qoddi, create your first content, and publish it!
You will need:
- A Qoddi account with billing activated (Strapi is not available on DEV instances because it requires more RAM to run effectively).
Install Strapi on Qoddi
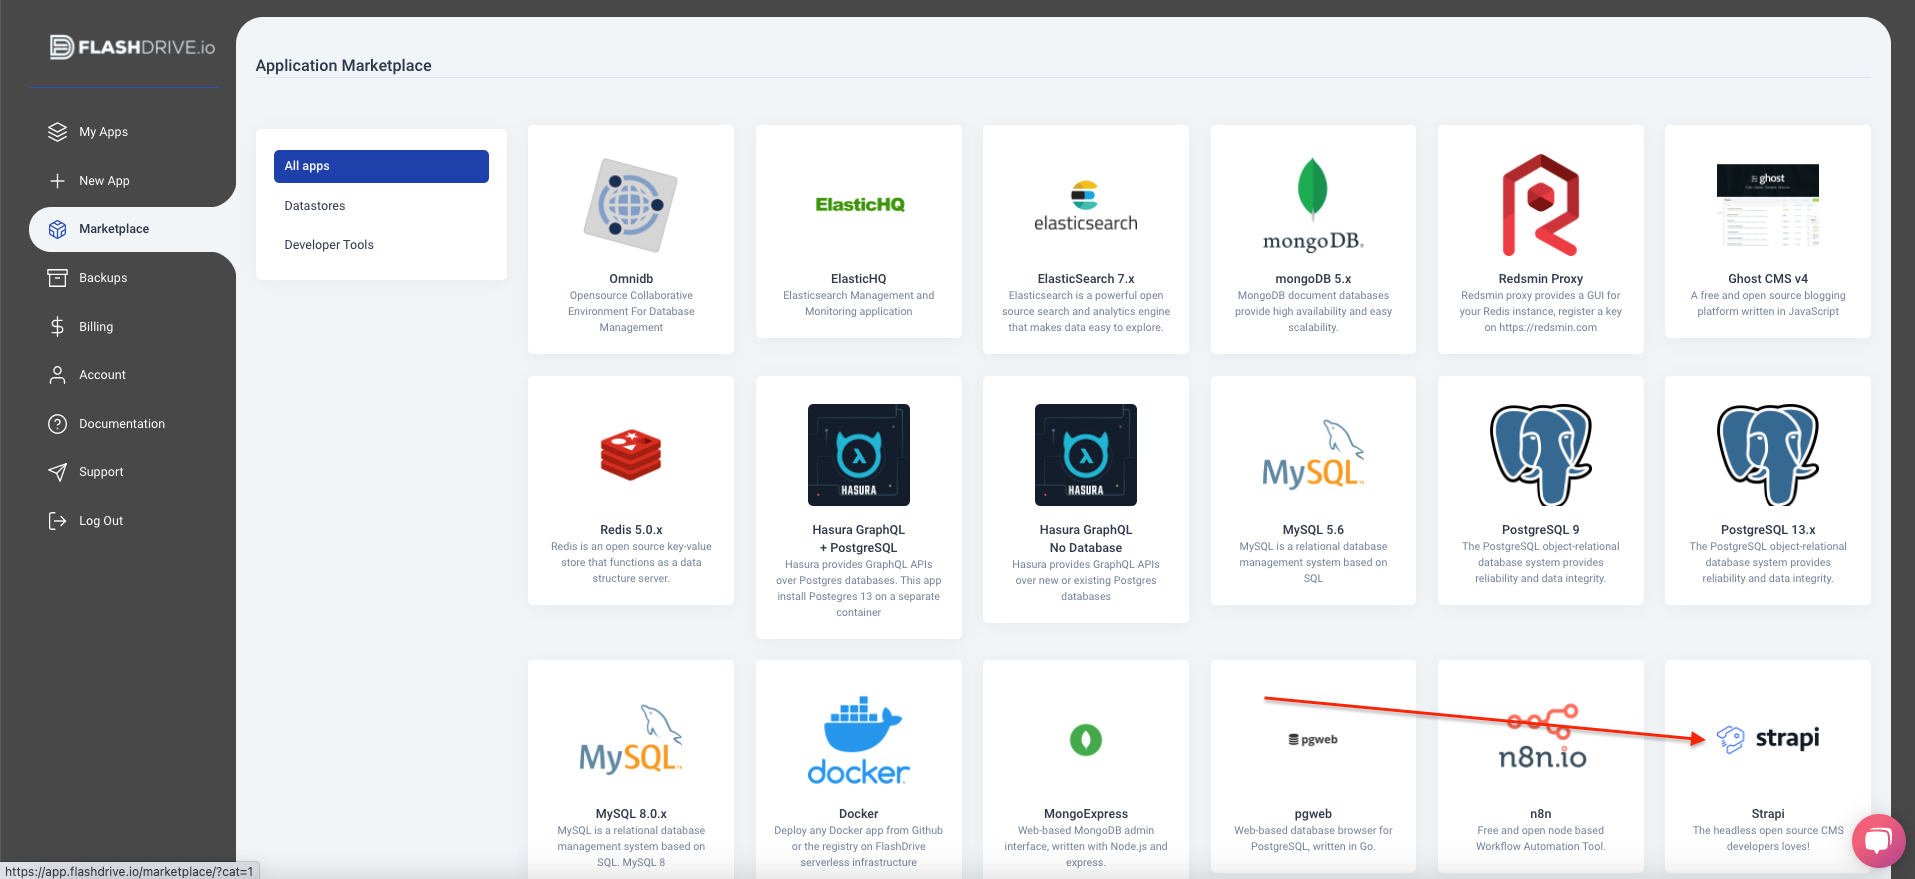
Installing Strapi takes two clicks: log in to your Qoddi account, visit the Marketplace menu, and click on the Strapi icon:
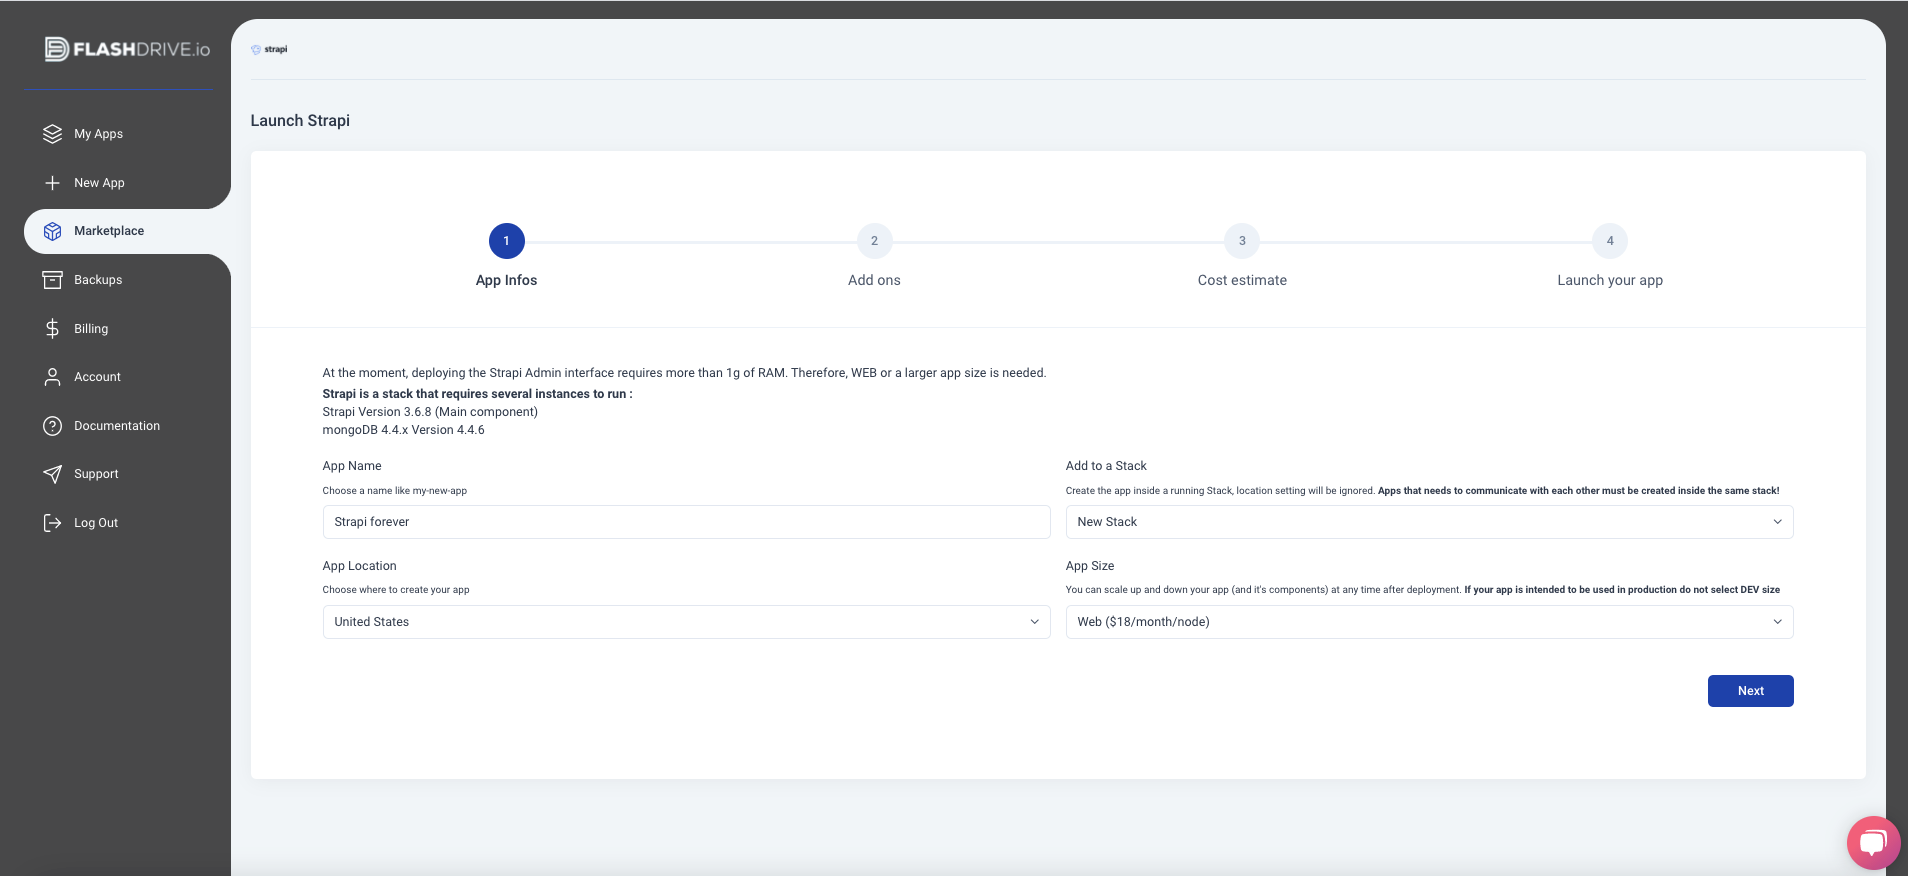
Add a cool name to your new Strapi App, select the location, and keep the Web size :
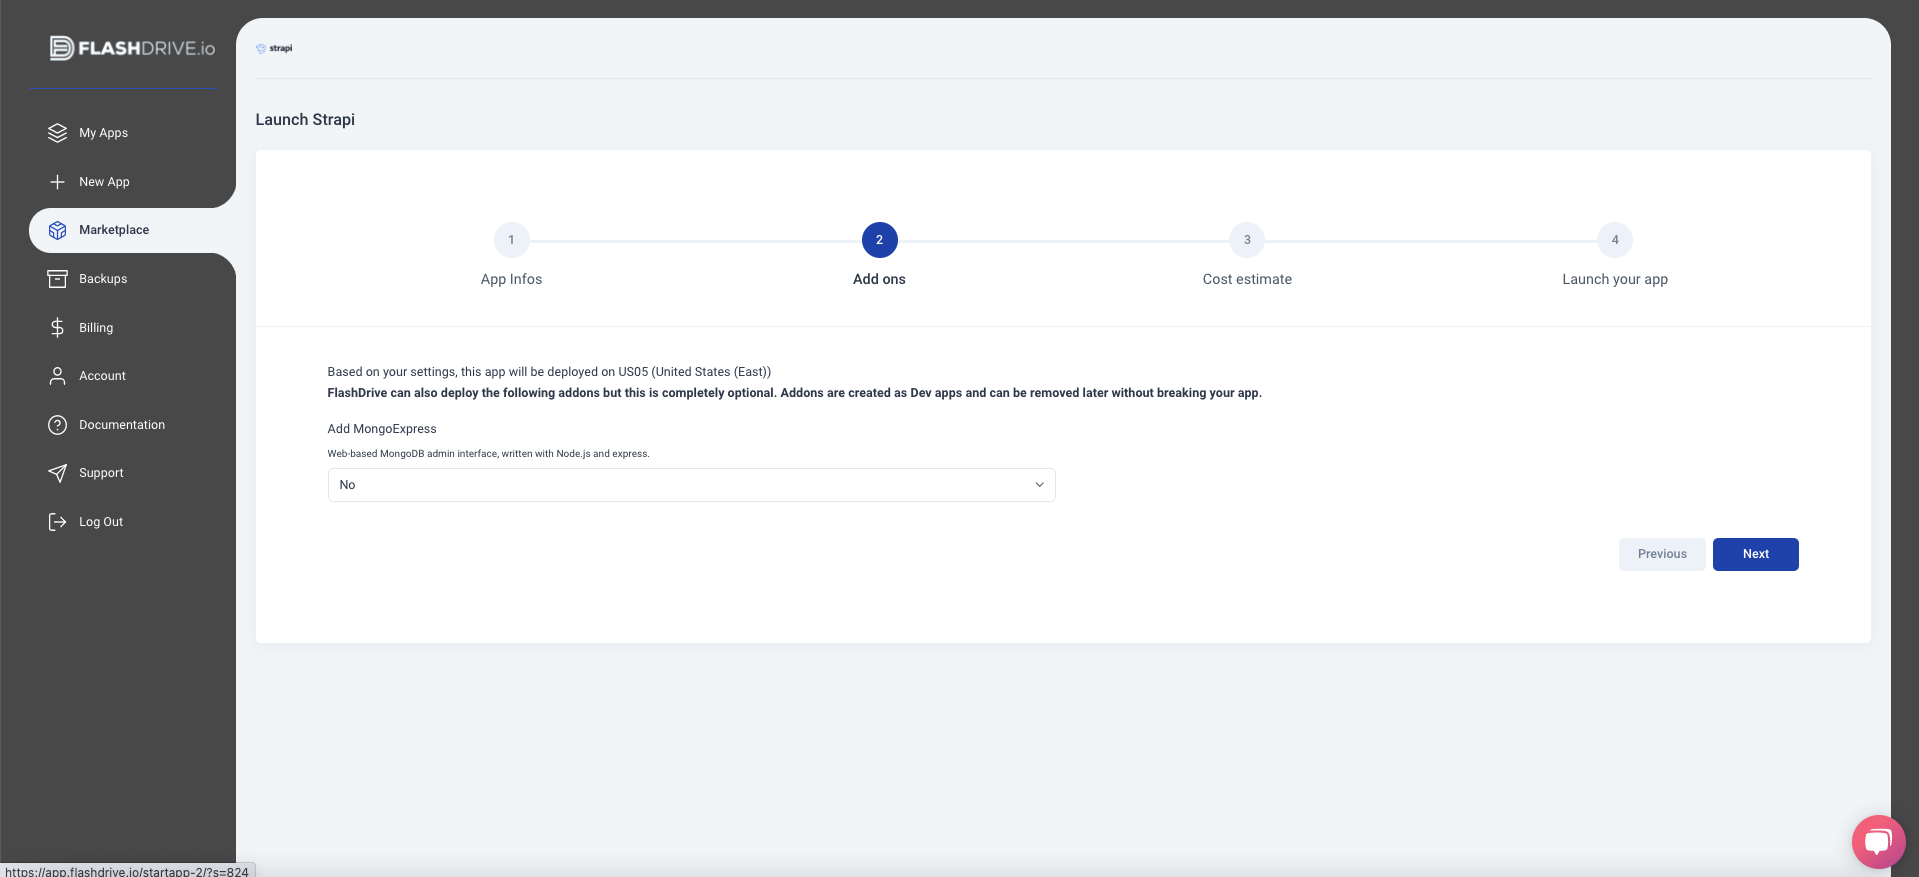
Click Next. we don't need Mongo Express with Strapi, so you can click Next again :
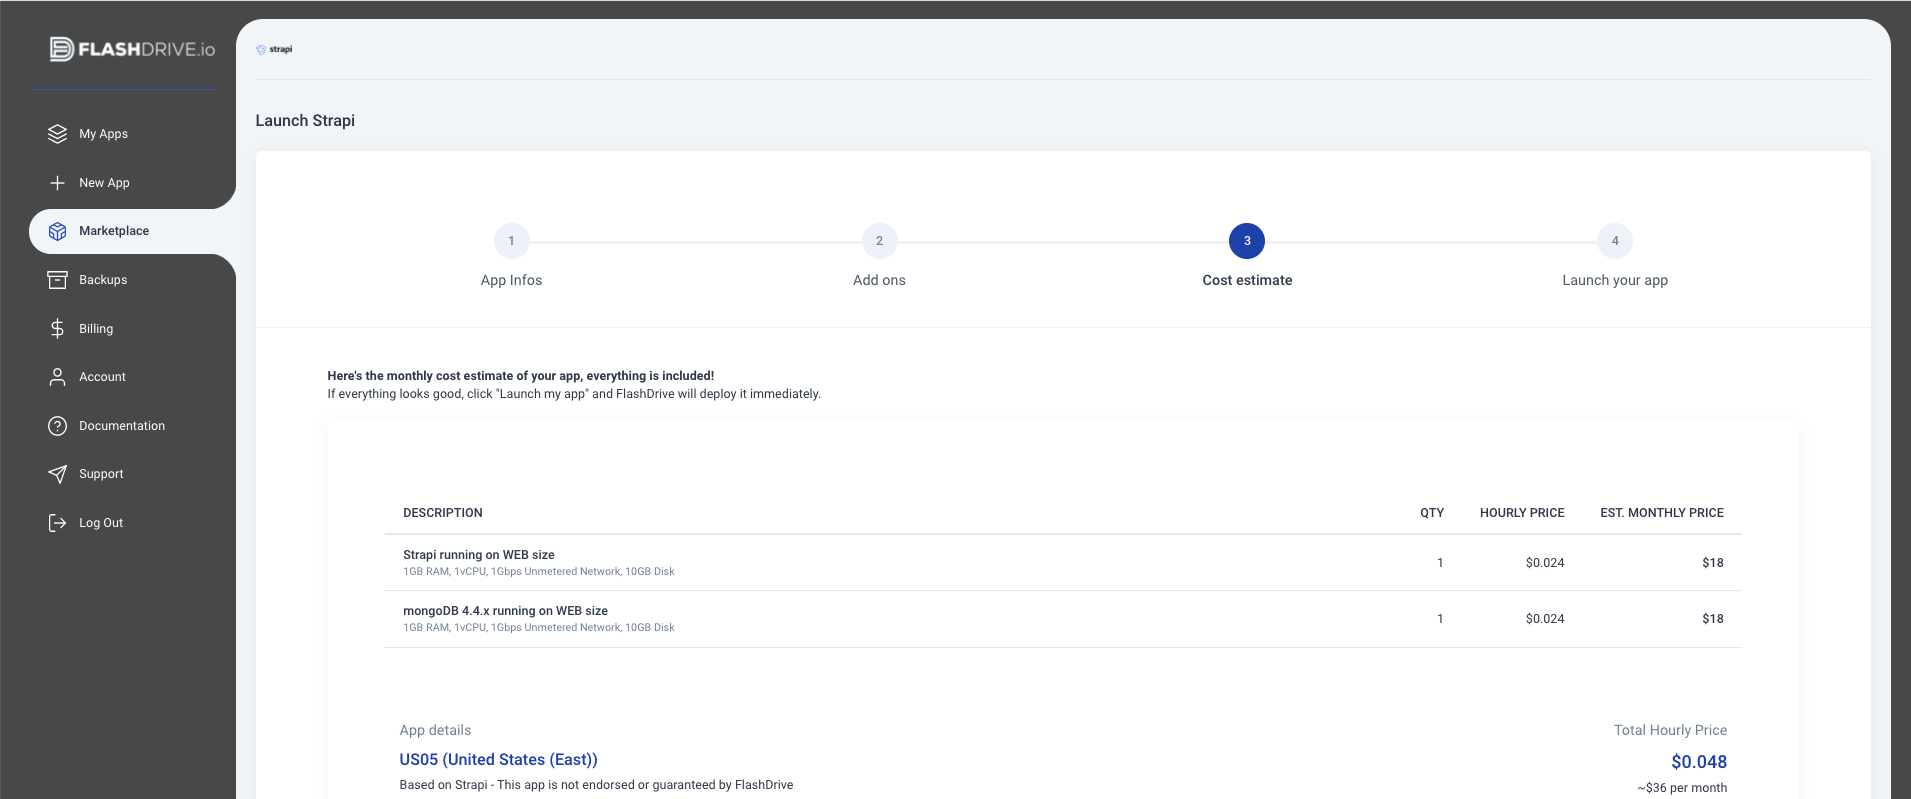
Verify the total monthly cost. Strapi + the attached MongoDB install will cost $36 total per month, and this size covers 99% of Strapi instances used in production:
Click Launch My App, and wait for the installation to finish. Qoddi will automatically install Strapi and a MongoDB database, make the connection between them and get everything ready for you. It can take up to 5 minutes for the installation to complete.
Once the installation is done, click on "Go to this app settings", and you will be redirected to your brand new Strapi stack composed of the Strapi instance and the MongoDB instance:
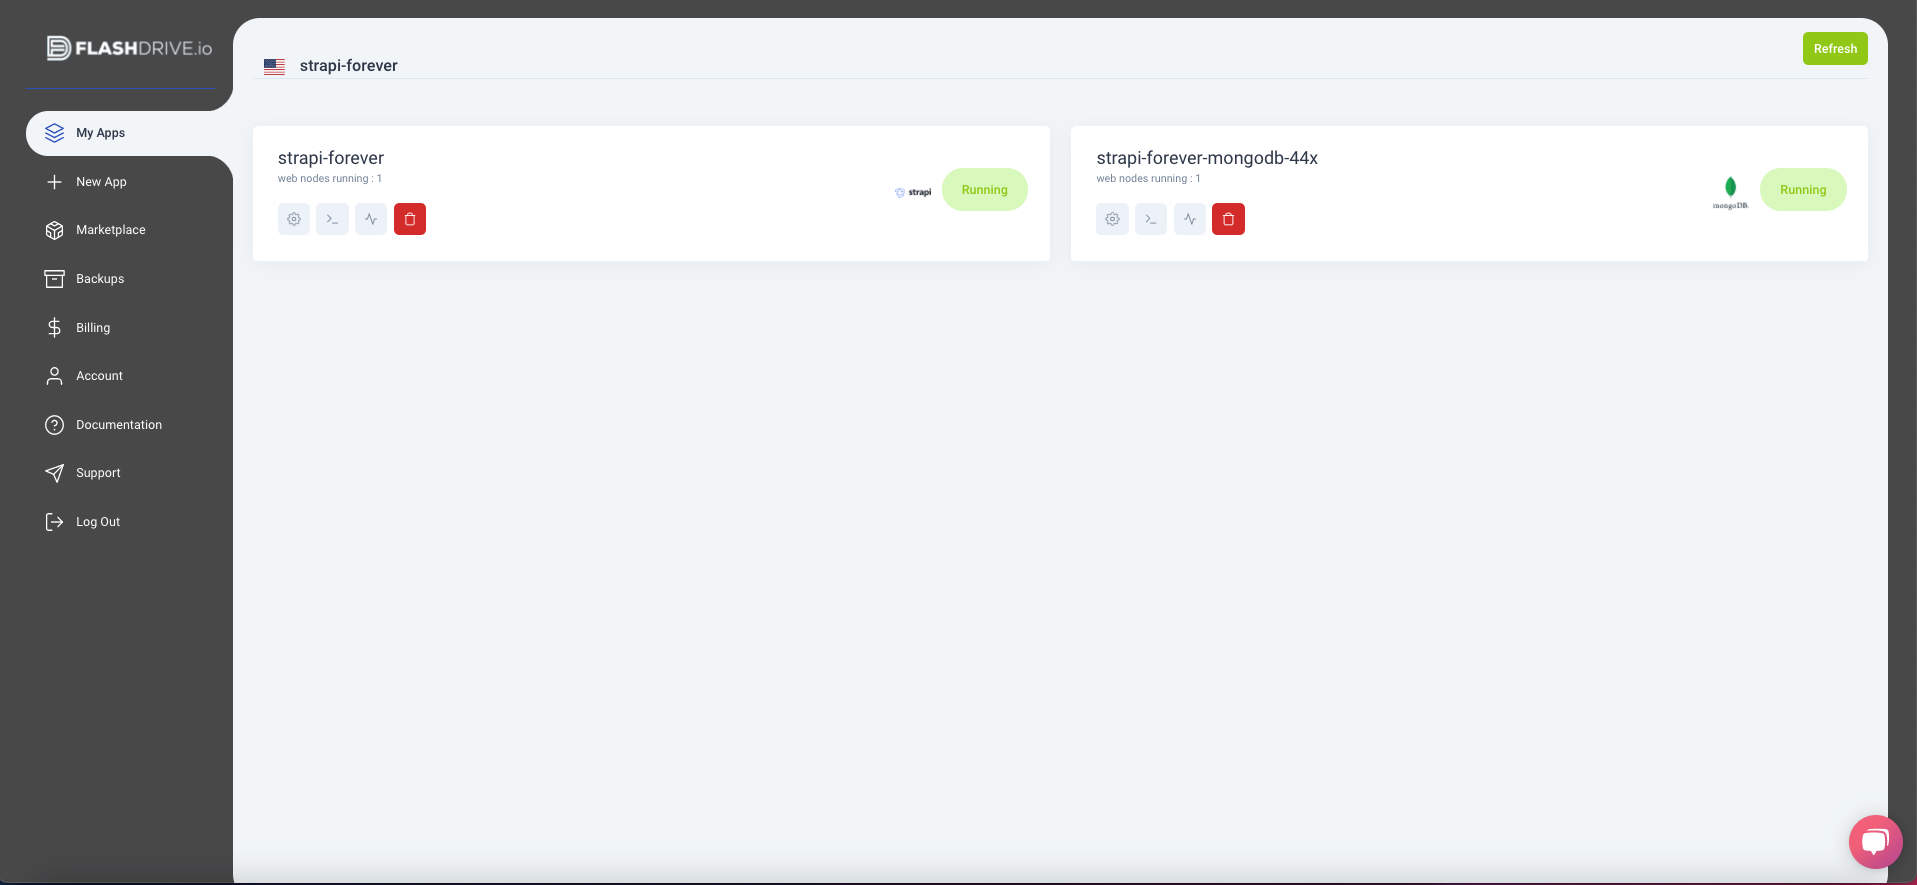
Click on the Strapi app (on the left) to access your app details:
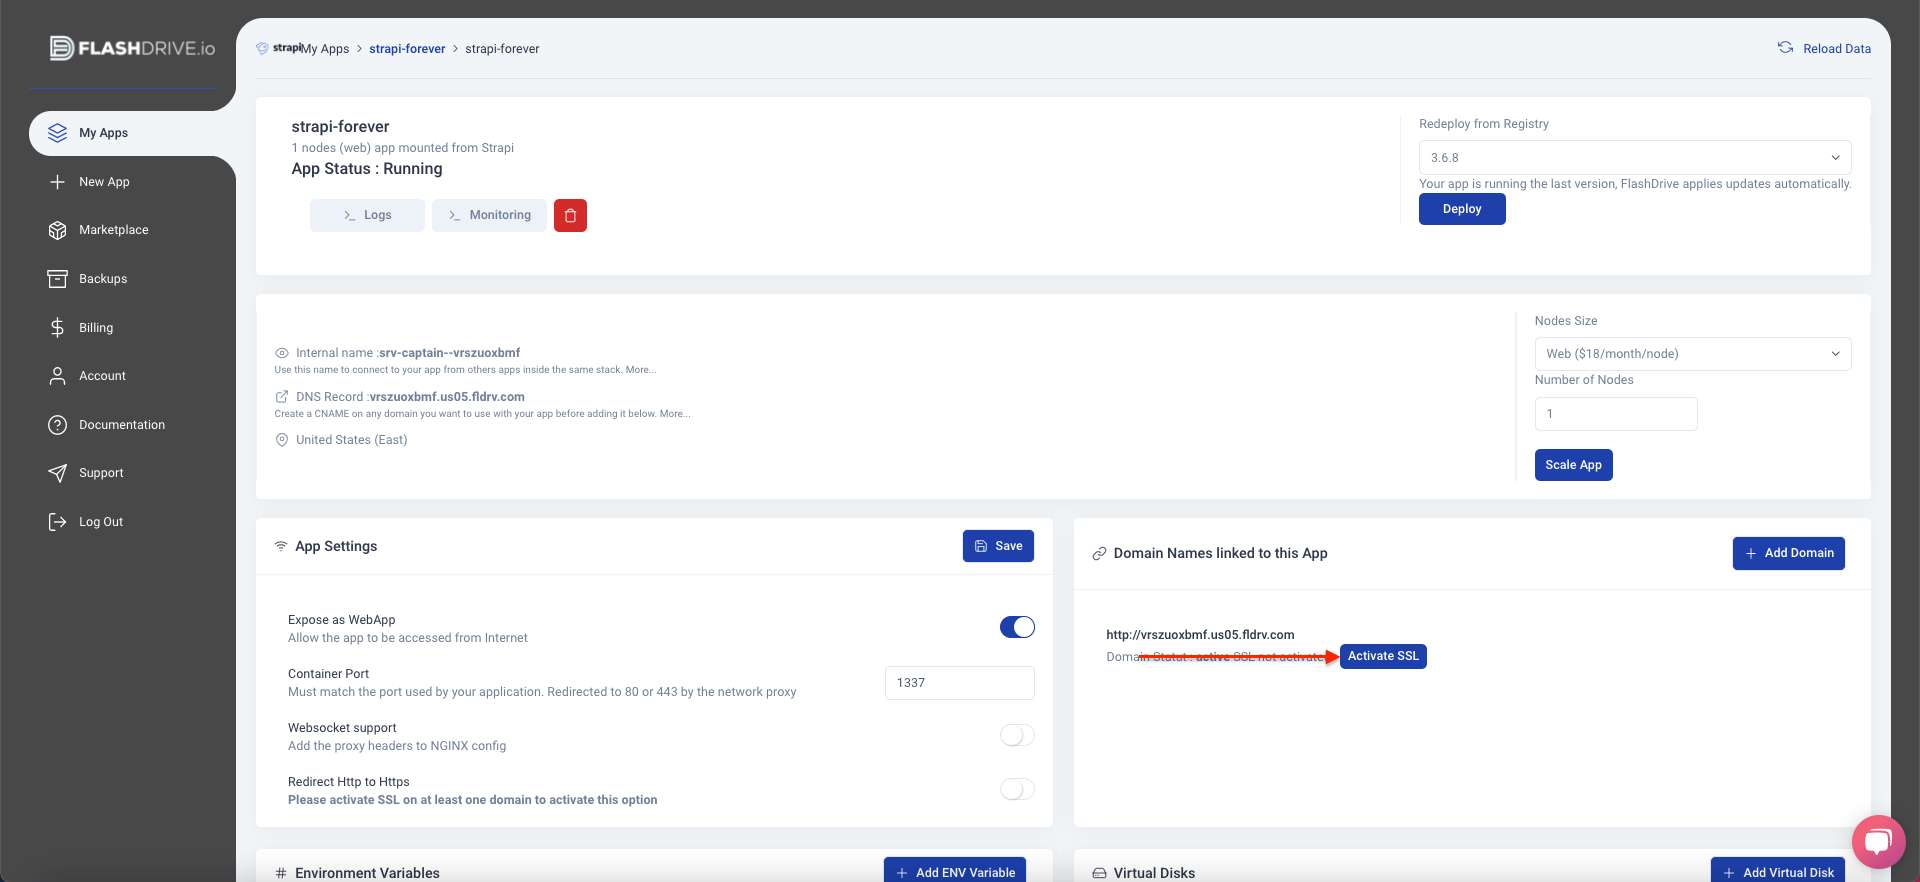
On this app, you can see all the details of your app including its domain name automatically attributed by Qoddi. You can add your own domain name and create a CNAME record to your app if you want to use your own, but you can continue to use the Qoddi domain for as long as you want.
Before starting to configure Strapi click to "Activate SSL" to have an SSL certificate automatically issued for your domain, then click on the URL to access your Strapi dashboard :
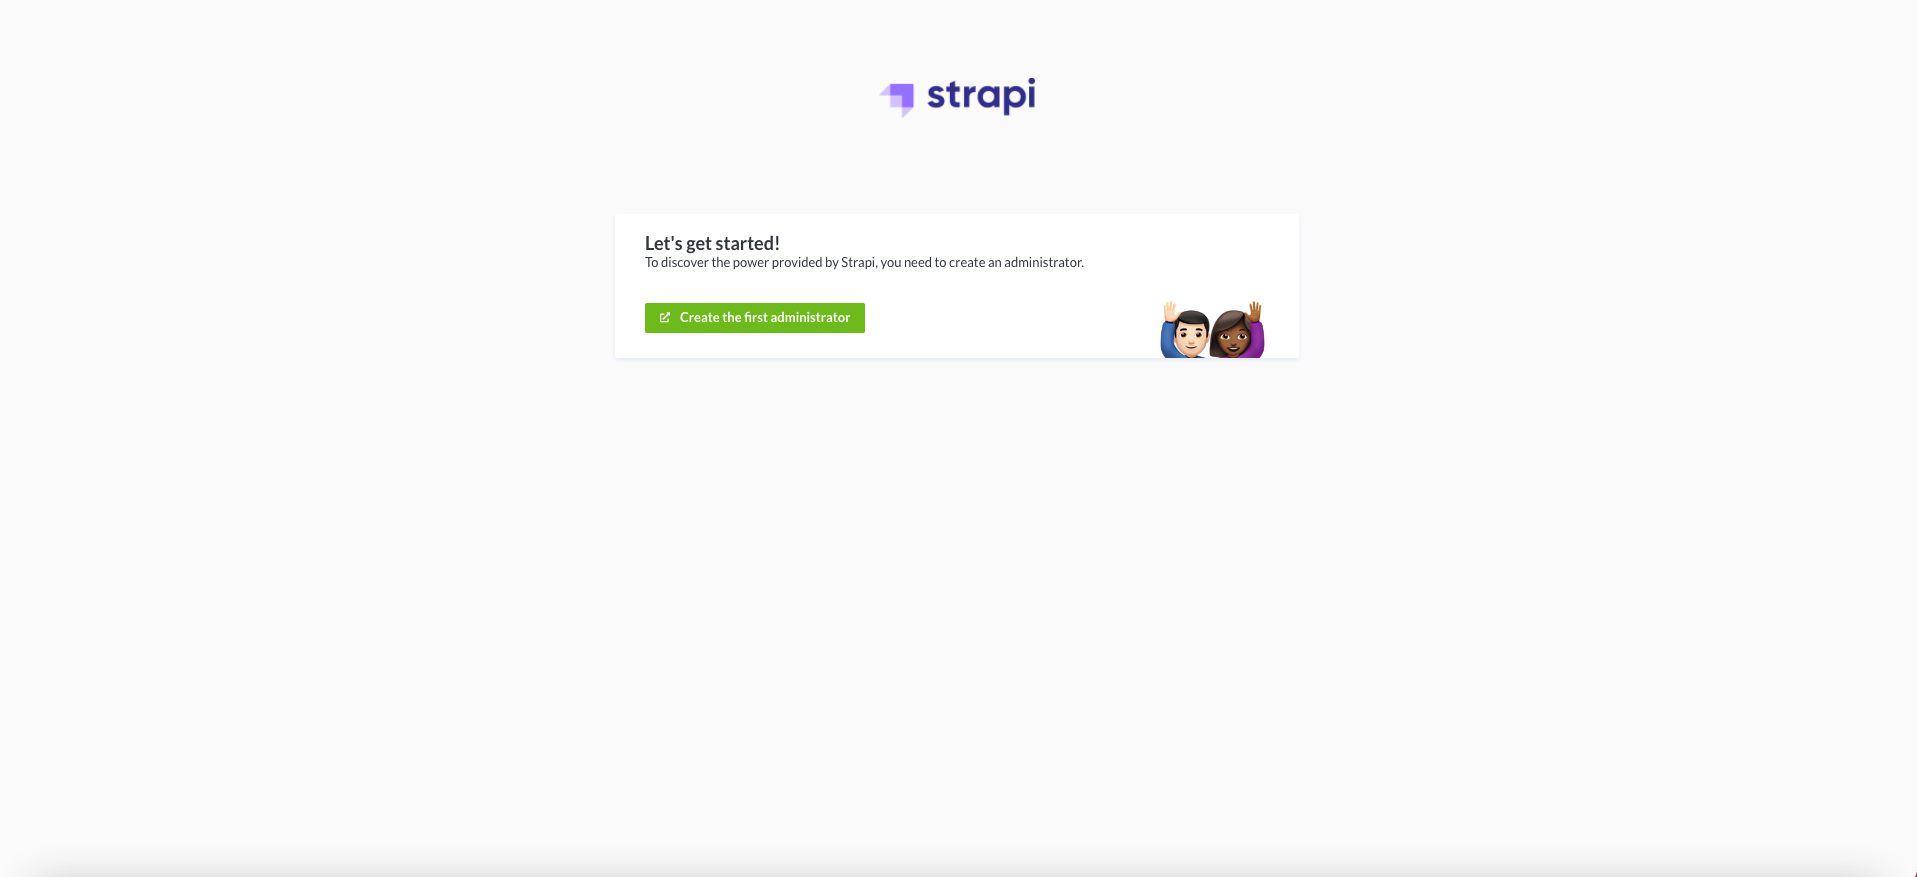
Fill the form with your name, email, and password, and click "Get started" to access your admin panel:
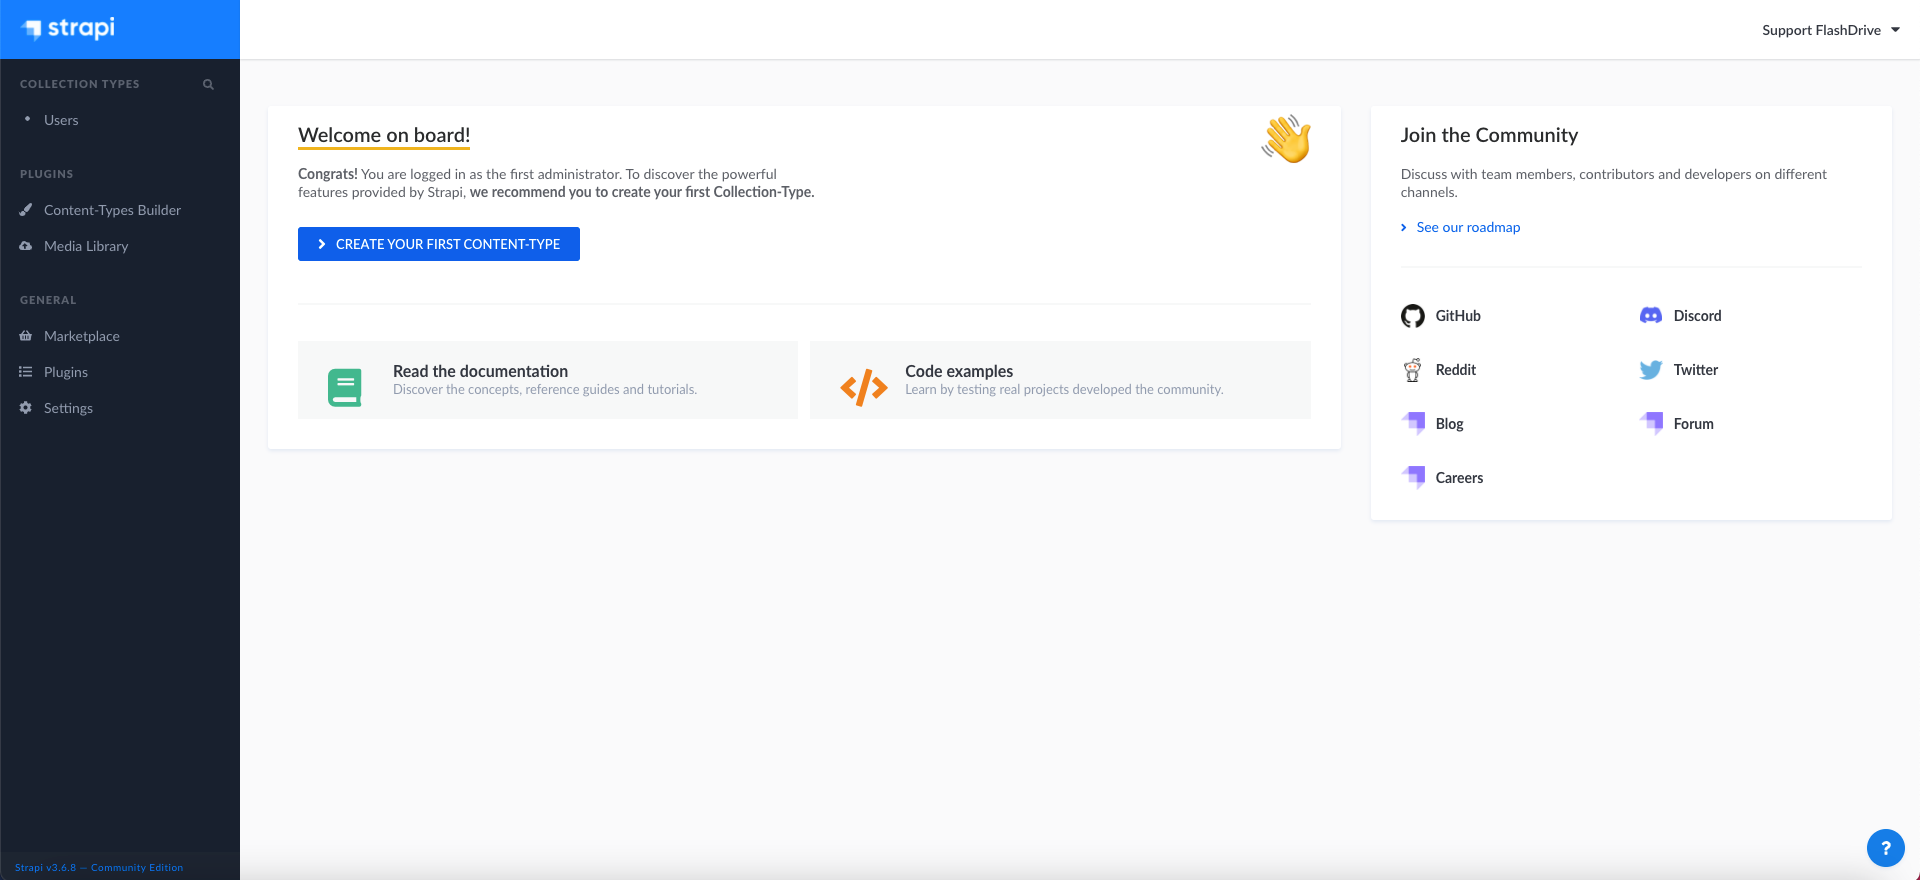
Congrats! Strapi is now installed on Qoddi, it's time to create your first content and start your API!
Create your content on Strapi
Step 1: Create collection types with the Content-Types Builder
The Content-Types Builder plugin helps you create your data structure. When creating an empty project with Strapi, this is where to get the party started!
Create a "Restaurant" collection type
Your restaurants directory will eventually include many restaurants, so we need to create a "Restaurant" collection type. Then we can describe the fields to display when adding a new restaurant entry:
- Go to Plugins > Content-Types Builder (opens new window)in the main navigation.
- Click on Create new collection type.
- Type
restaurantfor the Display name, and click Continue. - Click the Text field.
- Type
namein the Name field. - Switch to the Advanced Settings tab, and check the Required field and the Unique field settings.
- Click on Add another Field.
- Choose the Rich Text field.
- Type
descriptionunder the Name field, then click Finish. - Finally, click Save and wait for Strapi to restart.
Once Strapi has restarted, "Restaurants" is listed under Collection Types in the main navigation. Wow, you have just created your very first content type! It was so cool — let's create another one right now, just for pleasure.
Create a "Category" collection type
It would help to get a bit more organized if our restaurants directory had some categories. Let's create a "Category" collection type:
- Go to Plugins > Content-Types Builder (opens new window)in the main navigation.
- Click on Create new collection type.
- Type
categoryfor the Display name, and click Continue. - Click the Text field.
- Type
namein the Name field. - Switch to the Advanced Settings tab, and check the Required field and the Unique field settings.
- Click on Add another Field.
- Choose the Relation field.
- On the right side, click the Category relational fields box and select "Restaurant".
- In the center, select the icon that represents "many-to-many"
The text should read Categories has and belongs to many Restaurants.

- Finally, click Finish, then the Save button, and wait for Strapi to restart.
Step 2: Use the collection types to create new entries
Now that we have created a basic data structure with 2 collection types, "Restaurant" and "Category", let's use them to actually add content by creating new entries.
Create an entry for the "Restaurant" collection type
- Go to Collection types > Restaurants in the main navigation.
- Click on Add New Restaurants.
- Type the name of your favorite local restaurant in the Name field. Let's say it's
Biscotte Restaurant. - In the Description field, write a few words about it. If you're lacking some inspiration, you can use
Welcome to Biscotte restaurant! Restaurant Biscotte offers a cuisine based on fresh, quality products, often local, organic when possible, and always produced by passionate producers. - Click Save.
The restaurant is now listed in the Collection types > Restaurants view.
Add Categories
Let's go to Collection types > Categories and create 2 categories:
- Click on Add New Categories.
- Type
French Foodin the Name field. - Click Save.
- Go back to Collection types > Categories, then click again on Add New Categories.
- Type
Brunchin the Name field, then click Save.
Add Categories
The "French Food" and "Brunch" categories are now listed in the Collection types > Categories view.
Add a Category to a Restaurant
Go to Collection types > Restaurants in the main navigation, and click on "Biscotte Restaurant".
In the right sidebar, in the Categories drop-down list, select "Brunch". Click Save.
Step 3: Set Roles & Permissions
We have just added a restaurant and 2 categories. We now have enough content to consume. But first, we need to make sure that the content is publicly accessible through the API:
- Click on General > Settings at the bottom of the main navigation.
- Under Users & Permissions Plugin, choose Roles.
- Click the Public role.
- Scroll down under Permissions.
- In the Application tab, find Restaurant.
- Click the checkboxes next to find and findone.
- Repeat with Category: click the checkboxes next to find and findone.
- Finally, click Save.
Step 4: Publish the content
By default, any content you create is saved as a draft. Let's publish our categories and restaurant.
First, navigate to Collection types > Categories. From there:
- Click the "Brunch" entry.
- On the next screen, click Publish.
- In the Please confirm window, click Yes, publish.
Then, go back to the Categories list and repeat for the "French food" category.
Finally, to publish your favorite restaurant, go to Collection types > Restaurants, click the restaurant entry, and Publish it.
#Step 5: Use the API
OK dear gourmet, we have just finished creating our content and making it accessible through the API. You can give yourself a pat on the back — but you have yet to see the final result of your hard work.
There you are! the list of restaurants is accessible at https://yourqoddiurl/restaurants
We've now created a complete content API using Strapi hosted on Qoddi.
Don't forget all the benefits to host Strapi on Qoddi:
- Production-ready instances with dedicated compute power,
- Free Daily Backups with easy restoration and anti-ransomware protection,
- Ready to scale (add more nodes to Strapi or scale up the size of Strapi or MongoDB at any time),
- 10GB of virtual disk included (that's a lot of MongoDB data...),
- Free SSL certificates for all your web-facing apps
- Ultra-fast connectivity from around the world thanks to FlashDrive.io unique Edge network
Enjoy Strapi hosted on Qoddi.com!
