Store and retrieve static assets on AWS S3 with NodeJS on Qoddi
Deploy your code in seconds, with no infrastructure to manage. Qoddi App Platform is free for developers! Create an account today.
AWS S3 is a cloud storage service that saves data as an object associated with a key. Objects are like files and keys are like filenames. Objects are stored in a bucket. We will be auto-generating our object keys while uploading. In a free tier account, you get 5GB of free cloud storage with AWS S3.
Note: This tutorial is made for AWS S3 but works as well with S3 compatible providers like Wasabi.com
Prerequisites:
- An AWS account with at least a free tier,
- Basic knowledge of how AWS IAM, Express, EJS, Multer works.
- A free Qoddi account
S3 is a fast solution to store assets and it's heavily scalable.
AWS has its own NPM package to manage its services. We are gonna use that package to upload and retrieve files from S3 from our NodeJS app hosted on Qoddi.
Creating an AWS S3 Bucket
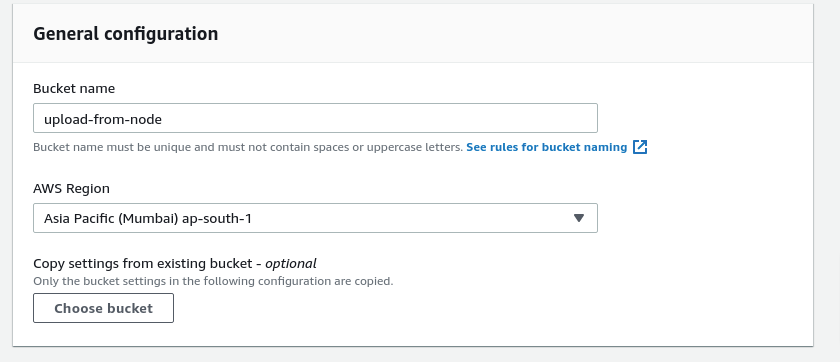
In your AWS account, go to S3 and create a bucket.
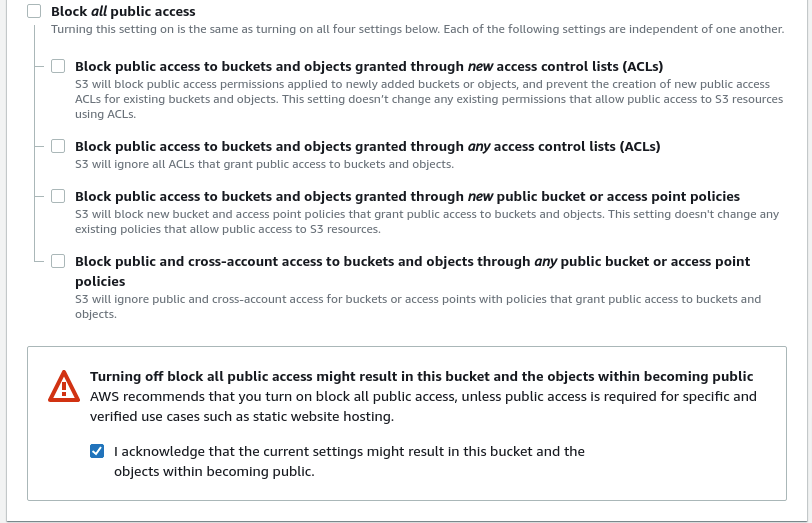
One bucket is enough for this project. Name it ‘upload-from-node’ and select a region. Deselect Block all public access and check the acknowledge checkmark. Keep other settings as is and hit ‘Create bucket’.
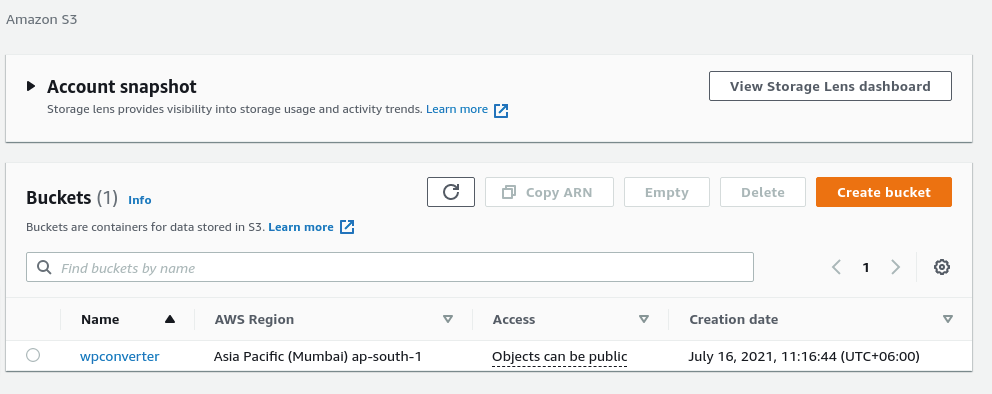
After creating your bucket it will show up in the list.
IAM User and User Group
Now, let’s create an user and an user group to give access to the S3 bucket we just created. Find IAM from the service menu or go to https://console.aws.amazon.com/iamv2/home#/users
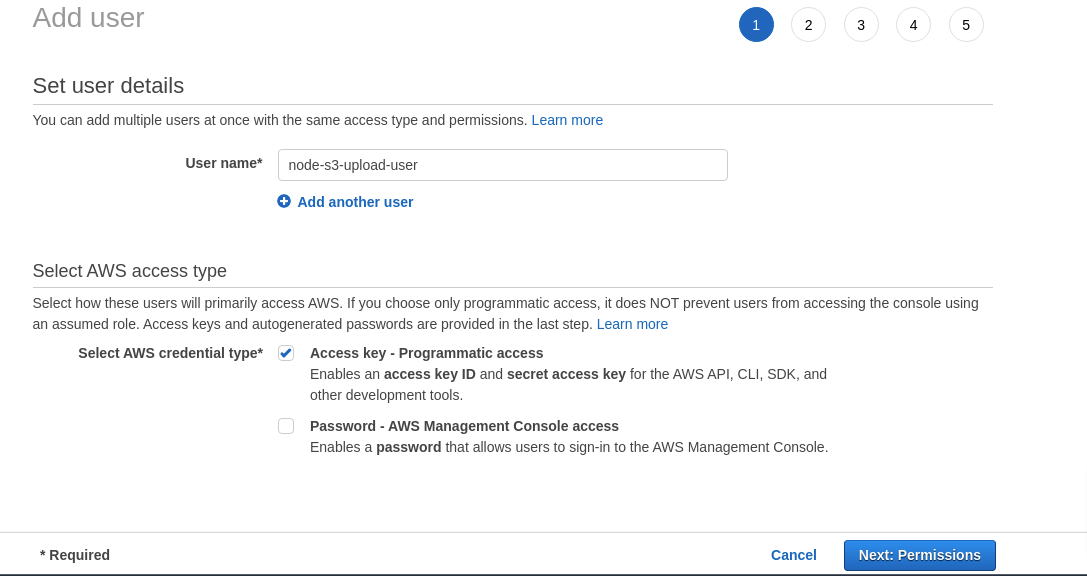
Hit the ‘add users’ button. Write a user name node-s3-upload-user and check Access key - Programmatic access checkbox.
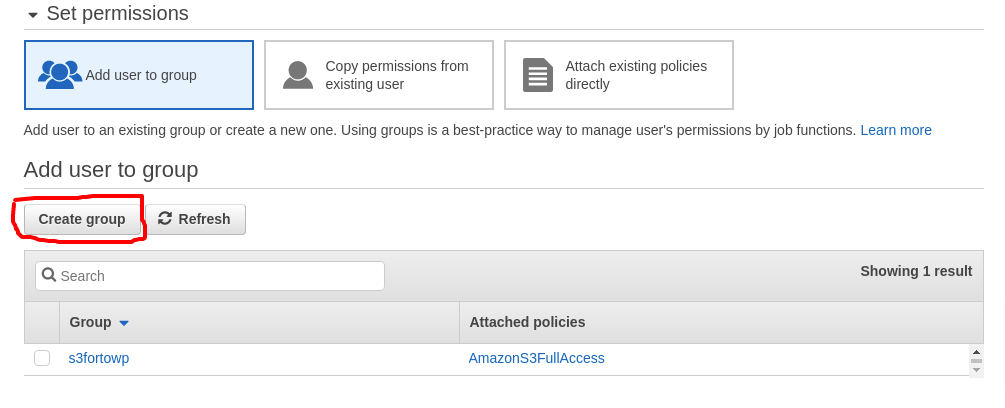
Next hit ‘create group’ to create a user group.
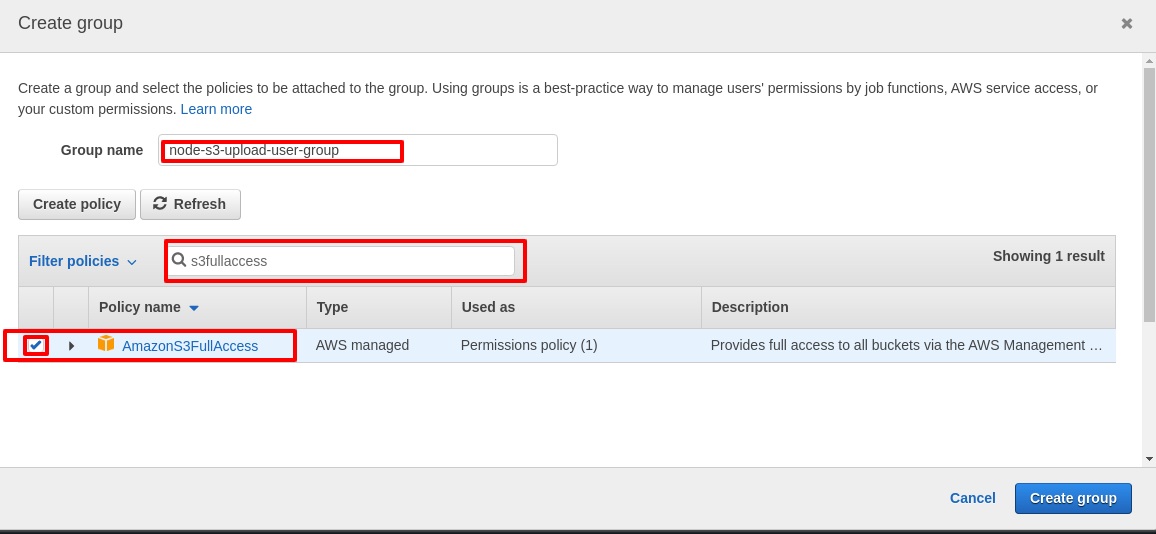
Add a name node-s3-upload-user-group. Search for policies ‘s3fullaccess’ and select the policy shown in the screenshot. Hit create group.
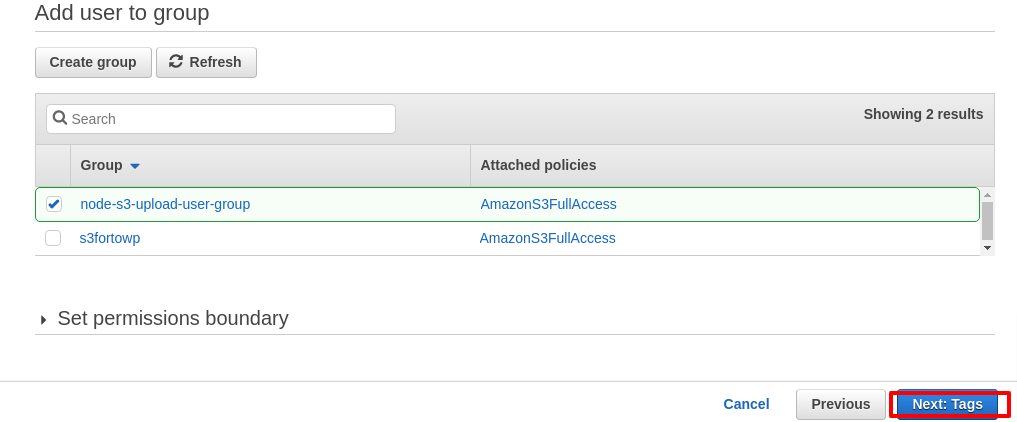
The next page will be the list of ‘user groups’. Make sure you select the group we just created and hit next.
We don’t need to add tags. So, just go next and press ‘create user’. This will give you this page, where you will see a success message.
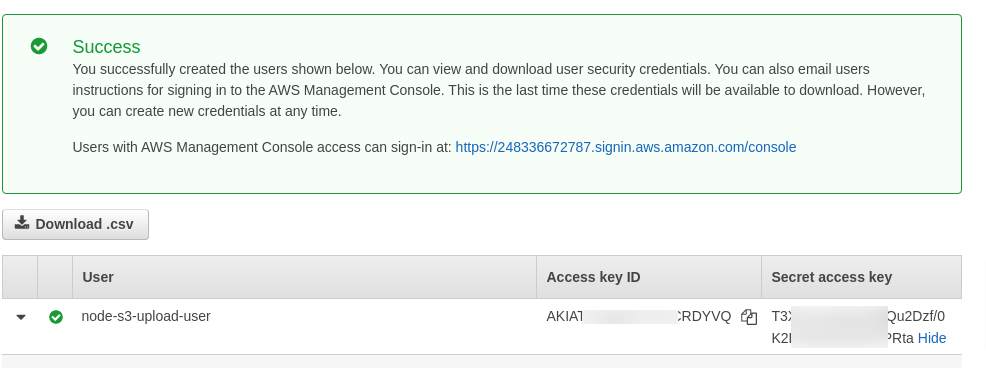
Make sure you save those keys. We need them to access and save data to the bucket we just created.
Configure AWS Credentials
The new AWS SDK imports credentials automatically from environment variables. You don’t need to specifically write them inside the project code (and you shouldn't for security reasons). Keep a note of the key_id and access_key provided by AWS before proceeding.
Start a Project to Upload Some File in S3 Bucket
Let’s start an express project with npm init and install some packages,
npm i express, ejs, multer, multer-s3, aws-sdk
Create a file server.js and paste this code there,
const express = require("express");
const app = express();

//body parser
app.use(express.urlencoded({ extended: true }));
app.use(express.json({ limit: "50kb" }));

//set view
app.set("view engine", "ejs");

//
app.get("/", (req, res) => {
   return res.render("home");
});

app.post("/upload", (req, res) => {
   res.send("okay");
});

//start server
const PORT = process.env.PORT || 5000;
app.listen(PORT, () => {
   console.log(`Server started @${PORT}`);
});
Here we started an express server, added body-parser, and an ejs view engine.
We are serving home.ejs from the ‘/’ route. And accepting post requests from the ‘/upload’ route. Now create a ‘views’ folder and create a home.ejs and paste this code
<!DOCTYPE html>
<html lang="en">
   <head>
       <meta charset="UTF-8" />
       <meta http-equiv="X-UA-Compatible" content="IE=edge" />
       <meta name="viewport" content="width=device-width, initial-scale=1.0" />
       <title>Home of S3 Show & Upload</title>
   </head>
   <body>
       <form action="/upload" method="post" enctype="multipart/form-data"">
           <label for="upload">Choose a image to upload to S3:</label>
           <input id="upload" name="img" type="file" />
           <br />
           <input type="submit" value="Upload to S3" />
       </form>
   </body>
</html>
Here we are gonna upload a file, send it to our backend server with an input field with name=’img’.
Connecting S3 with AWS SDK
AWS SDK let us create a new S3 connection with the access key, secret and region parameters. The multer-s3 package can use that credentials and handle the upload to the bucket we want. Let’s create an utils.js file in root and paste this code:
const AWS = require("aws-sdk");
const multer = require("multer");
const multerS3 = require("multer-s3");

const s3 = new AWS.S3();

AWS.config.getCredentials(function (err) {
   if (err) console.log(err);
   // credentials not loaded
   else {
       console.log("Access key:", AWS.config.credentials.accessKeyId);
   }
});
//using multer
var upload = multer({
   //storage using multer-s3
   storage: multerS3({
       s3: s3,
       bucket: "upload-from-node",
       acl: "public-read",
       metadata: function (req, file, cb) {
           cb(null, { fieldName: file.fieldname });
       },

       //generates key
       key: function (req, file, cb) {
           const ext = file.mimetype.split("/")[1];
           cb(null, Date.now().toString() + "." + ext);
       },
   }),
});
exports.uploadImage = upload.single("img");
Here we are creating a new S3 instance using AWS SDK and checking if it’s getting the credentials from the environment variables.
Then using multer-s3 to upload the file. Make sure you put your bucket name right. We are auto-generating the key name of the file from the date, so each file will have a unique key and we will be able to access the file using the key.
In the last line, we exported it to use on other pages. Here upload.single(“img”) takes a parameter img that comes from the name of the file input. So, let’s import it in our server.js and use it in our post request route ‘/upload’.
const express = require("express");
const { uploadImage } = require("./utils");
const app = express();

app.post("/upload", uploadImage, (req, res) => {
   const key = req.file.key;
   const link = req.file.location;
   res.render("image", {
       key,
       link,
   });
});
After uploading the file to S3, multer returns the file information inside req.file and we can use the location path to get the file link and use it in our html img tag. So, create an image.ejs inside the views folder and paste this code in it.
<!DOCTYPE html>
<html lang="en">
   <head>
       <meta charset="UTF-8" />
       <meta http-equiv="X-UA-Compatible" content="IE=edge" />
       <meta name="viewport" content="width=device-width, initial-scale=1.0" />
       <title>Image Show</title>
   </head>
   <body>
       <% if(typeof key != 'undefined'){ %>
       <h1><%= key %></h1>
       <img src="<%= link %>" width="500" />
       <% }%>
   </body>
</html>
That’s it, we now have a development server that can upload images to S3 bucket. Now, let’s deploy it to a real server on Qoddi.
Deployment
It’s super easy to deploy on Qoddi. It detects nodeJS and install npm on git push.
From your dashboard, go to New app and fill a little form.
For more information visit the official doc https://devcenter.qoddi.com/node-js/
Next, click on the GitHub button, and select your repository ‘node-s3-upload’ from the dropdown. Go next and select the branch name.
And finally, launch your app. Now, while your app builds, let’s create our environment variables front the bottom of the app setting page. We just need to create two variables there,
- AWS_ACCESS_KEY_ID
- AWS_SECRET_ACCESS_KEY
And provide the value from your S3 user account.

That’s it, check your URL and try to upload some images.
Github code - https://github.com/qoddiapps/node-s3-upload
